Well home depot had quite the selection in the sill cock (I still can't say the name with out giggling) department, but as it turns out finding our 1/2" male adaptor was a bit more challenging. They only had the adaptor we needed in an 8" SC. So we decided we'd grab it as a back-up (we had no water!), but headed immediately over to McLendon'ser hardware.

We had heard from a few people to check out McLendon's and man were they right! For those of you out there that get excited by hardware stores (like me!)-- add McLendon's to your list. The woman who helped us was a real sill cock expert. She gave us the full run-down on our 6" model, including the fact that they had shortened the model in the last few years, so we would probably need an adaptor.
We were instantly sold on the McLendon's sillcock- it was an exact match to the burst pipe, made of copper (not brass like the HD models) and our favorite selling point MADE IN THE USA!! I should also mention it was $5 cheaper than HD- hello savings!
While we were out we ended up picking up a few other supplies to finish the job:
- Cedar fence cap
- Caulking
- Caulking gun
- Pipe insulating tape
- Drill bit
- A paint sample color matched to our house


We screwed the new sill cock in nice and tight and were just about ready to call it a night... but wait.

Of all the things we had over-looked we forgot that the fence cap we had purchased as our upgrade was actually a 1/2" narrower than the old one. This meant we had a nice little gap between the wood and the faucet.
We discussed our options, and in the end we decided we would just use the old piece of wood. So we unscrewed, and rescrewed and voil-lay!

Greg went right to town with his caulking- sealing that baby right up.


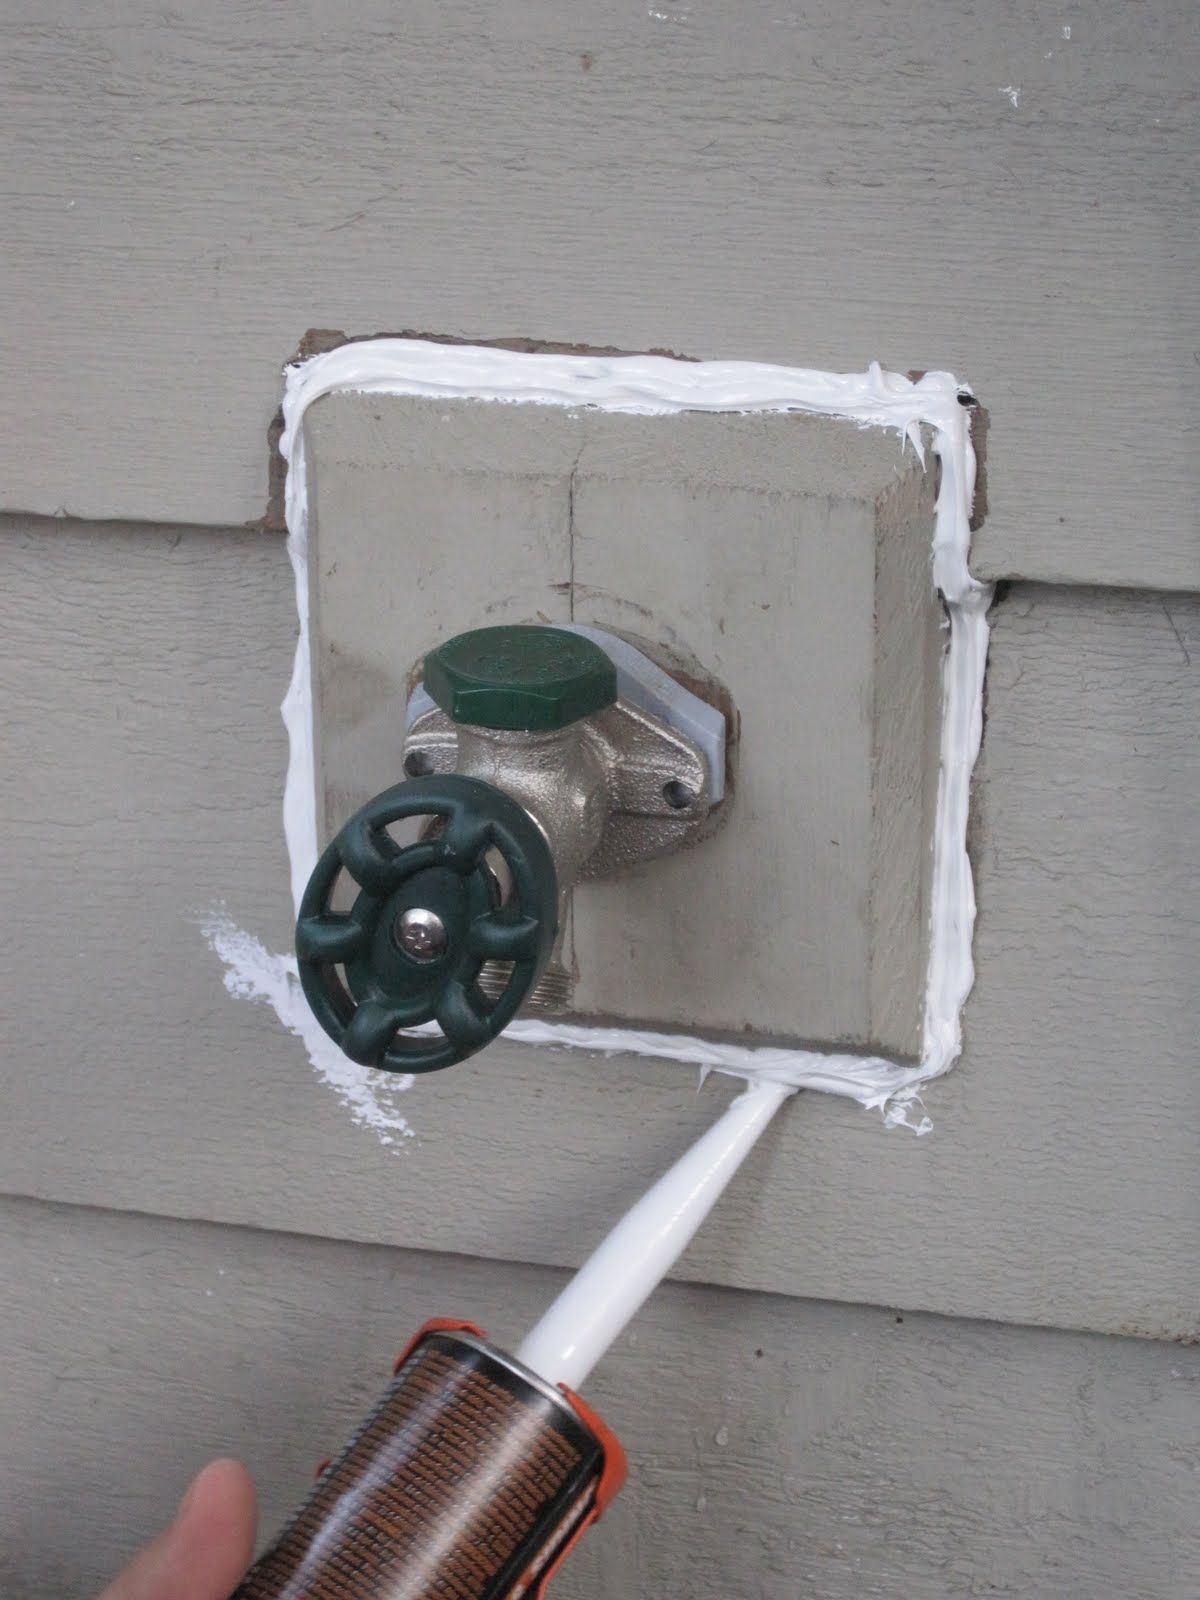
The caulking says it can take a few days to dry completely. We left it overnight and then Greg did a few touch ups to make sure their weren't any gaps. This weekend we're going to do the final paint over with our little color-matched sample from HD.

That pipe sure caused a few minutes of high blood pressure, but it turned out to be nothing we couldn't handle. Go team suburbanistas!
No comments:
Post a Comment